Monday, December 20, 2010

Emeril's Essence

I haven't posted in FOREVER as I have been busy. Very busy! In mid-May, we put our house on the market so I had a lot to do to get it ready. Then June was a busy month with the boys' end-of-the-school-year activities, and when summer vacation hit, the boys kept me busy and I didn't have time for blogging. In Sept., the boys started a new school so the 15-20 min. drive in the mornings and afternoons added to my busy schedule. By late Oct., we received an offer on our house and we went into escrow. Packing nine years of stuff was not an easy task but we did it. We had everything packed up and cleaned out in less than three weeks. In Nov., I decided to go back to school to get my Education Specialist Credential so I can teach Special Ed. I'm nervous about the workload but I'll figure out a way to balance family and school. So now it's already December and I haven't blogged since September. It's unbelievable how time just flies these days. I can hardly believe it's almost Christmas and 2011 is less than two weeks out. Crazy, right?!

I mixed up some Emeril's Essence to give to a few friends and family as part of their Christmas gifts. I use that stuff on just about EVERYTHING! It goes well on so many foods and I love the flavor. Chicken, pork, beef, fish, eggs, soup, sandwiches, quesadillas...endless possibilities I tell you. It's perfect. It's Emeril's Essence. Try it. You'll love it! Mix up a batch or two, divide it up into nice containers, tie a ribbon around it and include a recipe card. Simple and inexpensive.

Emeril's Essence

Yield: 2/3 c

Ingredients:
  • 2 1/2 tbs paprika
  • 2 tbs salt
  • 2 tbs garlic powder
  • 1 tbs black pepper
  • 1 tbs onion powder
  • 1 tbs cayenne pepper
  • 1 tbs dried oregano
  • 1 tbs dried thyme
Directions:
  1. Measure out ingredients in medium-sized bowl.
  2. Mix ingredients thoroughly.
  3. Put Emeril's Essence in empty seasonings container, airtight container or ziploc bag.

Wednesday, September 15, 2010

Vacation and Cooking

The end of August, we went on our annual, week-long summer vacation to South Lake Tahoe. We had great weather (low 70s while there was a spike in temps back home) and we enjoyed a fire-free summer for a change. This was the first vacation in four years that we didn't have to worry about fires, smoke, headaches and Son #2's asthma. The wind was a little crazy towards the end of the week and it even hailed our last day in Tahoe. Different weather than we were used to but a great vacation nonetheless.

Every Mom knows that a Mom on vacation with her family never truly enjoys a "vacation-vacation." There's still cooking and cleaning that needs to get done so I usually need a vacation from vacation. :) This Tahoe trip actually felt like a real vacation for a change. Even though I made all our meals, I planned easy ones so it didn't feel like work. We didn't have much planned other than bike rides and beach days so it was quite relaxing. We all had a blast!

This year, we did our vacation on the cheap. I'm talking super cheap. On our drive up, I jotted down breakfast, lunch and dinner ideas for the week and then made my grocery list. The list worked out really well! We went grocery shopping as soon as we rolled into Tahoe, and because we bought all the food, I stuck to the menu. We saved loads of money by eating at home and packing lunches for our beach days. We didn't eat out at all. That was the first time we've vacationed like that. The easy, inexpensive and quick meals kept our costs down but also ensured that I'd continue to cook healthy meals for my fam.

Meal Planning is not only good for vacations but if you're a busy mom, too. If you have the food in the fridge and know what you're going to make, it keeps you from going through the drive-thru. Keep it simple so you stick to the plan. :) Leftovers are also great for fast meals. I'm a big believer in cook once, serve twice so don't be afraid to grill up some extra chicken, pork or steaks. Just be sure to change up the dish so you don't serve the same boring leftovers.

This post is dedicated to my friends who ask me how I manage to stay busy in the kitchen...

Breakfast:
Cereal, fruit, bagels or quesadillas. The bacon and brie quesadilla was everyone's fave!
I cooked a large package of bacon in the oven and used a slice or two of bacon in our "gourmet" sandwiches.

Lunch:
Sandwiches or wraps...change it up every day so it's not "just a sandwich:" salami, turkey, ham, grilled chicken (leftover from dinner the night before), roast beef and add different cheeses, too (sliced cheddar, provolone, brie, etc.). Don't forget the lettuce, tomatoes and pepperoncinis. :)
Serve with chips/crackers, fruit and a cookie. When I serve a little junky snack with the healthy foods, my boys really enjoy their lunches and don't ask to eat out.

Dinner:
Make grilled chicken (grill extra chicken for sandwiches, quesadillas, burritos or enchiladas), spaghetti (get a large jar of sauce so extra sauce can be used for meatball subs), steaks (again, grill an extra steak or two), burritos (from leftover chicken or steak), enchiladas (again using leftover meats) and meatball subs (Super easy- just heat frozen meatballs in spaghetti sauce and serve in hot dog buns.  The buns are the perfect size for kids.)
Serve with salads, veggies and fruit. Serve a little ice cream to make dining IN a treat.  ;)

**To start, plan 2-3 days worth of meals and use the leftovers to get another 2-3 meals out of it. It's the perfect way to make healthier food choices for your fam. Stick to the plan and stay away from the drive-thru. :) 

Thursday, September 9, 2010

Creamy Chicken Enchiladas

In my prior post for "Enchilagnas," I mentioned getting meal deliveries through our local chapter of MOMS Club after I had Son #2. Having friends deliver hot meals at the end of an exhausting day was THE BEST! I got great meals but my FAVE, FAVE, FAVORITE!!! during the two week rotation was White Chicken Enchiladas from my sweet friend SL. I had never eaten a white sauce enchilada until she brought them over and I was HOOKED! They were one of my go-to recipes for the past six years and I make them often for friends and fam. They seem so fancy but they're the easiest dish to make and they taste amazing. In Feb., I started to blog about SL's awesome enchiladas but never got around to finishing it because I was trying to duplicate the white sauce from Amigo's in Bishop, CA. 

I LOVE Mexican food and I was on a hunt for new Mexican recipes to try. Last week, HW, a good friend from high school sent me a recipe for her Mom's enchiladas. The sauce base was the same as SL's white sauce but the addition of chicken bouillon cubes in HW's sauce added a new dimension to the sauce. WOW! The fam enjoyed EVERY bite! DEEEELISH!!!

I've since made a combination of the two white enchiladas. I used the salsa verde chicken mixture from SL's enchiladas but used HW's sauce. It was the perfect combo!

This creamy chicken enchilada is delicious. 

A buttery tomato and onion chicken mixture. YUM!

Creamy Chicken Enchiladas

Yield: 10 enchiladas in 13x9" pan.

Ingredients:
  • 10 soft taco size flour tortillas (or use 12 corn tortillas)
  • 1 lb jack cheese, shredded (I used ~ 1/2 lb, just enough for a thin layer over enchiladas.)
filling: 
  • 1/2 onion, minced
  • 2-3 tbs butter 
  • 2 chopped tomatoes
  • 4-6 oz green chiles, diced
  • 15 oz corn, drained (optional)
  • 15 oz black beans, drained and rinsed (optional)
  • 4 chicken breasts, cooked and cubed
sauce:
  • 1 pint heavy cream
  • 4 chicken bouillon cubes
Directions:
  1. Preheat oven to 350F.
  2. Melt butter over med. high heat and brown onion. 
  3. Add tomatoes and simmer 5 mins.
  4. Next, add chicken and simmer 20 mins.
  5. While chicken mixture is simmering, make the sauce. Dissolve bouillon cubes in the cream and stir well.
  6. Stack tortillas and place chicken mixture across "end" of tortilla nearest you. Roll and place seam-side down in dish. Continue with remaining tortillas.
  7. If you have leftover chicken mixture, add it to the sauce and mix well.
  8. Pour sauce over top of enchiladas and spread evenly over entire dish. 
  9. Add cheese over enchiladas, cover with foil and bake 25-30 mins or until bubbly. ENJOY!
Note: If you don't have time to make the tomato and onion mixture for the chicken, you can use 14-16 oz of salsa verde instead for the filling.

Source: Adapted from SL's and HW's White Chicken Enchiladas.

Wednesday, August 18, 2010

"Enchilagnas"

A "lasagna" with a Mexican twist is an "enchilagna!" I layer the ingredients for enchiladas into a lasagna-like dish to save a few minutes of rolling time. :) I make enchiladas often so I can roll 'em up pretty fast, but I was cooking for a group of eight and wanted to whip together a quick casserole dish. The "enchilagnas" were perfect and my friends ate it up! :)

I got this recipe six years ago when my friend brought me a meal after having Son #2. I was active in MOMS Club and received meals every other day for two weeks. That was AWESOME because I was exhausted from caring for my 3 yr old and newborn son and the last thing I wanted to do was make dinner at the end of a busy day. I asked DP for her recipe because the dinner she brought was tasty. My boys and I made GREAT friends through MOMS Club and we have wonderful memories from our park days, outings and holiday activities. Look into a local chapter if you have little ones. You'll love it!  

Ok, so this is an easy recipe and one that comes together quickly. I'm all about quick and easy as those are the best meals for busy people. Check it out!

Layers of goodness.

The whole "enchilagna" with guacamole, black bean/corn dip, cilantro lime ricechipotle salsa and chips. YUH-UH-UMMMMM!

"Enchilagnas"

Yield: 6-8 servings

Ingredients:
  • 1 lb lean ground turkey (or ground beef)
  • 1 med. green pepper, chopped
  • 1 med. red pepper, chopped
  • 1 med. onion, chopped
  • 16 oz chunky salsa
  • 1 can- 14.5 oz diced tomatoes, undrained
  • 1 can- 15 oz corn (I omit if I'm serving my black bean/corn dip.)
  • 6 soft taco size flour tortillas (You can use 12 corn tortillas if you prefer.)
  • 1-2 c sharp cheddar cheese, shredded
optional toppings:
  • black olives, sliced
  • jalapenos, sliced
  • onions, chopped
  • cilantro, chopped
  • hot sauce
Directions:
  1. Preheat oven to 375F.
  2. Cook turkey in large skillet. Drain when almost cooked through. Add peppers and onions to meat and cook another 5-6 mins or till veggies have softened.
  3. Stir in salsa, tomatoes and corn and bring to boil.
  4. In 13x9" dish, spoon 1 c meat mixture onto bottom of dish. Top with 3 flour tortillas to cover top of meat mixture. If using corn tortillas, you will cover meat with 6 corn tortillas across the top.
  5. Spoon half remaining meat mixture over tortillas. Sprinkle cheese across mixture. I do a thin layer.
  6. Top with remaining 3 flour tortillas (or 6 corn tortillas) and meat mixture. Cover with foil.
  7. Bake 25-30 mins. Remove from oven, uncover, sprinkle with some more cheese (more or less to taste) and put back in oven for add'l 5 mins or till cheese has melted. Let stand 5 mins before serving.
Source: Adapted from friend, DP.

TIP: You can make this dish a day in advance of serving. Prepare everything above to Step #6 then cover and refrigerate. To serve, bake covered at 375F for 45-50 mins or till heated through. Remove from oven and sprinkle with cheese (I like a thin layer but lay on the cheese if you like it cheesy.) Put back in oven for add'l 5 mins or till cheese has melted. Let stand 5 mins before serving.

Tuesday, August 17, 2010

Yaki Nasu: Chilled Roasted Eggplant

I wanted to start cooking more Japanese food so I recently joined a Japanese cooking group called Washoku Warriors. We're cooking our way through Elizabeth Andoh's cookbook, Washoku: Recipes from the Japanese Home Kitchen. I'm looking forward to trying new dishes!

This month's challenge was open so I chose an eggplant dish. The only time I buy eggplant is when I make it for get-togethers so I can share it with friends. It's the one veggie that my fam doesn't care for so I hardly ever buy it. I love roasted Japanese eggplant so I decided to make yaki nasu, a chilled roasted eggplant dish for Challenge #12. My Obaa-Chan (Grandma) and my Mom made this dish often so I was looking forward to trying my hands at this as well. It was delicious and I even got Son #2 who has a total aversion to eggplant to eat a few bites. Eggplant obviously isn't an "egg" product, but the name alone makes him cringe due to his egg allergy. I'm glad he tried it and liked it. :) 

This was perfect served alongside Challenge #11's Hiyashi Chuka. It's great over a bowl of rice, too.

Yaki Nasu: Chilled Roasted Eggplant

Yield: 4 servings

Ingredients:
  • 4 Japanese eggplants
  • 1 green onion, sliced
marinade:
  • 3/4 c basic sea stock (p 92- kombu, water, katsuo-bushi)
  • 3 tbs seasoned soy concentrate, divided (I used garlic and kombu infused soy sauce.)
Directions:
  1. Preheat broiler or prepare a hot grill.
  2. Wash eggplants and make 3-4 shallow slits in each eggplant. Broil/grill for 5-8 mins or till tender, turning occasionally. 
  3. Remove eggplants from heat. When cool enough to handle, cut off stem and remove skin. Slice into lengthwise strips.
  4. Make marinade using 1 1/2 tbs soy concentrate (reserve the rest till serving time). I didn't make the sea stock as I was given a tea bag-like packet from my Mom that I added to water to make "instant" sea stock. So easy!
  5. Add eggplant to shallow glass pan so the eggplant strips are completely covered by the marinade. Cover with plastic wrap and marinate in refrigerator for 1 hr or overnight for best flavor.
  6. When ready to serve, remove eggplants from marinade and place on serving dish. Drizzle reserved/remaining soy concentrate over eggplant and garnish with sliced green onions. ENJOY!

Monday, August 16, 2010

Kansas City-Style Barbecue Sauce

I've put together barbecue sauce ingredients in a crockpot when making a barbecued meat dish of some sort but I've never actually made barbecue sauce. This Kansas City-style BBQ sauce is FANTASTIC! It's exactly what I love in a bbq sauce. Tangy and sweet yet spicy, too...gooooooood stuffffff!!! It's the pepper that gives this sauce a bit of a kick which was surprising to me because I don't think black pepper is spicy. I absolutely LOVE all foods spicy and wanted to add chili powder or cayenne pepper but held off with just the black pepper to see how much heat black pepper could bring. It was perfect! It was spicy but not so much that my kids couldn't eat it. This is a great sauce for my fam. YAY!

I used the last of my store-bought bbq sauce when making the sauce for pulled pork but wanted more bbq sauce for pulled pork sandwiches. I already had a rough day running errands with the kidlets so I was NOT about to drag them to the store for a bottle of sauce. This sauce was fab and I most likely will NEVER buy another bottle of barbecue sauce. Ok, maybe when in a pinch...

I didn't can the sauce...just thought it looked nicer in a jar than the old bbq sauce bottle. :)

Yummy bbq sauce on a tasty pulled pork and coleslaw sandwich. 
REALLY GOOD STUFF!

Kansas City-Style BBQ Sauce

Yield: 3 cups

Ingredients:
  • 2 c ketchup
  • 1 c water
  • 1/2 c apple cider vinegar
  • 1/2 tbs onion powder
  • 6 tbs brown sugar
  • 2 tbs lemon juice
  • 1 tbs Worcestershire sauce
  • 1/2 tbs ground black pepper (Use less if you don't like the heat.)
Directions:
  1. Combine all ingredients in med saucepan. 
  2. Bring to a boil then reduce to simmer.
  3. Simmer gently till sauce is thick and smooth about 2+ hrs. Stir occasionally to prevent burning.
  4. Enjoy on just about everything! I LOVE SAUCE!!!
Source: Adapted from Tiny Test Kitchen.

Friday, August 13, 2010

Pulled Pork

Pulled pork is so easy to make and it tastes delicious, too. You can throw it in a crockpot or stockpot and literally forget about it. I've made chicken, pork and beef in the crockpot/stockpot and everything turns out fantastic. I don't think that one is necessarily better than the other. From my experience, it's the amount of meat you're cooking that determines which product to use.

Because I had a small pork loin, I used a medium-sized saucepan. The pork was juicy, moist and tender. Yummy stuff for sure! I made coleslaw and a tangy-yet-spicy barbecue sauce to make it a fantabulous pulled pork sandwich. It was SOOOOO tasty! The coleslaw and barbecue sauce REALLY made this a delicious sandwich. DEEEELISH!!!

My boys ate this up and were disappointed that I didn't make my usual double batch of pork. They would've eaten pulled pork sandwiches for the next three meals if I let them. :) Cooking in bulk Costco-style is great because having cooked pork in the fridge allows me to make quick meals: salads, burritos, tacos, enchiladas, quesadillas, soups and more! If you know you'll burn out on eating pork for several meals, freeze small portions in ziploc baggies. When you're ready for more pork, throw a frozen pork baggie in the fridge and it'll thaw within a day or two. Then you can make fast and easy meals and use up the remaining pork. Easy and a lot healthier than going through a fast food drive thru!

The coleslaw in the sandwich really makes it yummy!

Pulled Pork

Yield: 4-6 servings

Ingredients:
  • 1-2 tbs extra virgin olive oil
  • 1 lb pork loin
  • 1 onion, sliced
sauce:
  • 2 tbs Dijon mustard
  • 1/2 c BBQ sauce
  • 2 tbs red wine vinegar
  • 6 oz beer
Directions:
  1. Mix sauce ingredients in med bowl.
  2. Heat oil in stockpot over med high heat. Place pork loin in stockpot and sear all sides. Do not move the pork as it cooks 2-3 mins per side so it browns nicely.
  3. When pork is seared, lift out of stockpot and add sliced onions on bottom. Place pork on top of onions. 
  4. Pour sauce over pork and turn down heat to low. Simmer for 3+ hrs or till pork is cooked through.
  5. Remove pork from sauce and shred using two forks. When shredded, add back to sauce and mix well to coat pork. ENJOY!
Serving suggestions: Pulled pork sandwiches, tacos, quesadillas, enchiladas, nachos, soups, salads.

Wednesday, August 11, 2010

Coleslaw

My fam really liked this coleslaw. Son #2 couldn't eat this due to his egg allergy (there's egg in mayonnaise) but I set aside some of the coleslaw mix and served his portion with Italian dressing instead. I don't like to exclude him from food I make so I made a special coleslaw for him. He ate it up just like we did our "regular" coleslaw. :)

This coleslaw was similar to Kentucky Fried Chicken's coleslaw but not as sweet. The last time we had KFC was nine years ago when I was pregnant and craved their two piece meal with coleslaw, mashed potatoes and a biscuit. From what I remember, their coleslaw was pretty sweet.

When I decided to make pulled pork sandwiches, I knew coleslaw would be great served with the sandwiches. I looked up coleslaw recipes, ran to the store and gathered up the ingredients. This coleslaw was the perfect complement. I topped my pulled pork with coleslaw and the combination in my sandwich was fantastic! 

I'm not a coleslaw fan but this was good!

Coleslaw

Yield: 6-8 servings

Ingredients:
  • 14-16 oz package coleslaw mix
  • 2 tbs onion, minced (I used dehydrated onion)
  • 2 tbs sugar
  • 1/2 tsp salt
  • 1/8 tsp black pepper
  • 1 tbs Dijon mustard
  • 1/4 c milk
  • 1/2 c Miracle Whip (or mayonnaise)
  • 1/4 c buttermilk (I set aside 1/4 c milk and added 1 tbs red wine vinegar in lieu of buttermilk.)
  • 1 1/2 tbs white wine vinegar
  • 2 tbs lemon juice
Directions:
  1. In large bowl, combine coleslaw and onion.
  2. If you don't have buttermilk, measure out 1/4 c milk and add 1 tbs red wine vinegar and let it "curdle."
  3. In separate bowl, combine remaining ingredients and mix until smooth consistency is reached.
  4. Pour dressing over coleslaw mix. Stir well and chill for 1+ hrs. ENJOY!

Source: Adapted from Sugar Cooking

Monday, August 9, 2010

Curt's Spicy Chicken

We enjoyed a lovely dinner with great friends a couple weekends ago. As we indulged in our wine and cheese, Curt whipped together the most awesome chicken. It was the best chicken I've had in quite some time. It was tender chicken breasts simmered in a super spicy tomato sauce with onions and green bell peppers. The sauce kept the chicken juicy and the jalapenos added a nice kick to the dish. It was a unique dish, one I'd never tasted before. It was like chicken cacciatore but with a Mexican twist. I love saucey dishes and this was perfect for me!

I couldn't stop thinking about the spicy chicken as I love ALL foods spicy. I just HAD to try to duplicate Curt's dish. As Hubby was eating his dinner, he mentioned that I forgot to add the cumin. Cumin schmumin. The chicken was still tasty but I'll definitely make this dish again WITH the cumin.

Curt's chicken was REALLY good but I think ALL meals made by others taste better. :)
My version turned out pretty darn good!

Curt's Spicy Chicken

Yield: 4-6 servings

Ingredients:


  • 4 chicken breasts cut into fourths

  • extra virgin olive oil

  • 1/2 onion, chopped

  • 1 yellow pepper, chopped (Green or red peppers are great in this dish, too.)

  • 1/2 tbs garlic, minced

  • jalapenos, chopped (remove seeds if you want less heat)

  • 1- 15 oz can tomato sauce (I had 6 roasted Roma tomatoes so I pureed those with 

  • the jalapenos in my food processor.)

  • 3 oz tomato paste (Add if you want a thicker sauce.)

  • cumin (forgot to add but will add 1/2 tsp next time)

  • garlic salt and pepper to taste (green onions, optional)
Directions:

  1. In large skillet over med. heat, add a little oil and saute onions, peppers and garlic for 3-5 mins then set aside.
  2. If making your own tomato sauce, add roasted tomatoes and jalapenos to food processor and pulse till smooth texture is achieved.
  3. In same skillet, sear chicken breasts over med. heat 3-4 mins per side or till browned on both sides.
  4. When chicken is browned, add onion mixture, tomato sauce (add tomato paste to chicken sauce if desired), garlic salt and pepper. Turn heat to low and simmer 30-40 mins. The longer you simmer, the better the flavor. 
  5. Serve over rice, pasta or eat with tortillas. :) ENJOY!
Source: Adapted from CMG.

Wednesday, August 4, 2010

Egg-Free Blueberry Pancakes

New Year's Day 2009, my parents took us to the St. Regis Monarch Beach Resort for brunch. I don't like taking him to out to breakfast due to his egg allergy (the mere smell of egg makes him nauseous), but when making the reservation, my Mom was assured by the St. Regis staff member that the Chef would take my son's allergies into consideration and make something for him. I was skeptical that the chef would have time to provide a special egg-free breakfast on such a busy morning but I figured there'd be something we could choose from as a back-up plan since we were at a buffet brunch.

I was surprised and most definitely grateful when the Chef made my sweet son pancakes from scratch. From scratch! We've never had a chef go out of their way to make something special so I was thankful for the special attention that was given my son. The look on my son's face when he was served a platter o' pancakes was priceless. He was grinning from ear-to-ear! We went to the pancake/waffle area and he loaded up his pancakes with chocolate chips, marshmallows, sprinkles and M&Ms. This was a special treat so I let him go to town! 

A BIG THANK YOU to the St. Regis Chef who made my special son a special treat!

When I make pancakes, I use Bisquick because all the other mixes have egg in the dry mix. I follow the Bisquick directions but leave out the egg and they turn out fine. They're a little flatter than "regular" pancakes but Son #2 thinks they're great. The boys wanted pancakes but I was out of Bisquick mix so I poked around online and reviewed several pancake recipes. If the St. Regis Chef could make egg-free pancakes, I was determined to do the same. ;)  

These pancakes were delicious. SOOOO delicious!

Fluffy like "real" pancakes. I don't think I'll ever buy Bisquick again!

Egg-Free Blueberry Pancakes

Yield: 10 4" pancakes

Ingredients: 
  • 1 c flour
  • 1 tbs sugar
  • 2 tsp baking powder
  • pinch of salt
  • 1 c milk (Use soy milk for vegan pancakes.)
  • 2 tbs Canola oil (I'm trying with 1 tbs next time.)
  • 1 c blueberries (fresh or frozen)
Directions:
  1. In med. bowl, mix dry ingredients.
  2. Add milk and oil and mix until smooth.
  3. Gently fold in blueberries.
  4. Spray non-stick pan or griddle with oil and heat over med. heat. 
  5. When pan/griddle is hot, pour batter and cook ~2 mins. or till batter looks bubbly on top. Mine didn't bubble so much so I lifted a pancake and checked for browning. When browned, flip over and cook another minute or till browned on bottom side.
  6. Stack on a plate, cover with aluminum foil to keep warm and continue making pancakes with remaining batter. Best when served immediately. :) ENJOY!
Source: Adapted from The Gluttonous Vegan

Monday, August 2, 2010

Thick & Hearty Meat Sauce

I love a fantastic thick and chunky meat sauce. I love when sauce has TONS of meat AND veggies and it's more "stuff" than sauce. MMMMMM...that's THE BEST! Thick and chunky sauce is great for my boys because it's not messy like a runny saucy-sauce and they fill up on protein and veggies. :) Good stuff for sure!

I don't make spaghetti often, but when I do, my boys are STOKED! They LOVE spaghetti and meat sauce and think it's such a treat when I make it for them. The sauce is great over breaded chicken for a quick chicken parmesan, on a piece of bread with toppings for an easy "pizza bread" snack or over sauteed veggies. I could eat the chunky sauce on its own. YUM YUM! 

I've made sauce a few times and I made this version with canned tomatoes this time around to make things easier. This sauce is fast, easy and delicious! No photo opp for this spectacular sauce as it was so good it got eaten up before I could take a pic. :)


Thick & Hearty Meat Sauce

Yield: 6-8 servings

Ingredients:
  • 1- 28 oz can peeled crushed tomatoes in puree
  • 2-3 tbs extra virgin olive oil
  • 1-2 tbs garlic, minced (We LOVE garlic so I use 2 tbs.) 
  • 2 bay leaves
  • 1/2 onion, minced
  • 1 tsp dried oregano
  • 1/2 tsp dried basil
  • 1/2 tsp dried thyme
  • 1/2 tbs sugar (counteracts acidity from canned tomatoes)
  • 1/2 c red wine
  • 1 c beef stock if you like a saucier-sauce.
  • 1 lb ground mild Italian sausage (if using links, remove casing and then cook like ground beef)
  • add sauteed veggies if desired (I added a zucchini, squash, onion and garlic mixture.)
  • parsley for garnish
Directions:
  1. Heat oil in large saucepan over med heat. Add garlic, bay leaf, onions and saute for 3-4 mins.
  2. Add tomatoes and herbs to garlic mixture. Stir occasionally until sauce thickens slightly. 
  3. Add sugar and wine, stir well and simmer 1-12 hrs. Simmer as long as possible for best flavor. I usually make a 2 hr sauce and it tastes great. 
  4. In separate pan, cook sausage thoroughly. To remove excess oil when sausage is fully cooked, place wire rack on plate, cover rack with paper towels and then scoop cooked sausage onto paper towels. Bring up sides of paper towels over sausage and press sausage to squeeze out oil. Add to sauce and simmer some more.
  5. If adding veggies, saute veggies first and then add to sauce. Let it simmer some more. ENJOY!

Saturday, July 31, 2010

Kiss Cookies

When I made Peanut Butter Kiss Cookies for friends, I made a special batch of cookies for Son #2 because he's allergic to peanuts. I don't like to make foods he can't eat, but if I do, I always make a special allergy-free batch for him. He LOVES when I make special treats for him. :)

These cookies were soft, buttery and melt-in-your-mouth delicious! These cookies were so large we ended up with 8 cookies. I measured out one tablespoon of dough per cookie when I made the Peanut Butter Kiss Cookies and those were the perfect size. I'll do that with this batch next time...

These were tasty but the chocolate to cookie ratio was off.
Note: Use less dough and make bite-sized cookies.

Kiss Cookies

Yield: 8 large cookies, ~3" diameter (I recommend smaller cookies, ~1" diam.)

Ingredients:
  • 1/3 c powdered sugar
  • 1 stick butter
  • 2 tsp vanilla
  • 1 c flour
  • 1/4 tsp salt
  • Hershey Kisses, unwrapped
Directions:
  1. Preheat oven to 350F. Line baking sheet with parchment paper or silpat.
  2. In stand mixer bowl, combine powdered sugar and butter until thoroughly combined.
  3. Add vanilla and mix well.
  4. Gradually add flour and salt and mix until dough forms.
  5. I originally used a Pampered Chef medium scoop to measure out the dough which I turned out to be too much dough. I recommend using a tablespoon to measure out cookie dough balls: one leveled tbs per cookie, roll into ball and place on lined baking sheet 1-2 inches apart.
  6. Bake 13-15 mins or until lightly browned. Do NOT over-bake!
  7. Remove from oven and gently press unwrapped Hershey Kiss in center of each cookie.
  8. Return to oven and bake another 2-3 mins or till cookies are golden.
  9. Cool 5 mins on baking sheets then transfer to wire rack to cool completely. ENJOY!

Source: Adapted from Food Allergy Mama

Friday, July 30, 2010

Peanut Butter Kiss Cookies

Although Son #2 has peanut allergies, I do have peanut butter in the house. My six year old can tolerate peanut products around him but he definitely cannot eat peanuts or nuts of any kind. Every time I open the peanut butter jar, I'm extremely careful to keep it contained and I wash everything immediately. If peanut products were life-threatening to my son, I most definitely would not have it in my house. 

Our friends were camping at Doheny State Beach so I baked them Peanut Butter Kiss Cookies. I wanted to use up the remaining peanut butter in the large, Costco-sized container and I had the perfect amount for these little cookies.

Stay tuned for an egg-free and peanut-free version of these cookies. That post is next! :)

Peanut Butter + Chocolate = Bliss

Peanut Butter Kiss Cookies...
AKA Peanut Butter Blossoms

Yield: ~ 3 dozen cookies

Ingredients:
  • 1 1/2 c flour
  • 1 tsp baking powder
  • 1/4 tsp salt
  • 1/2 c creamy peanut butter
  • 4 tbs butter, room temp
  • 1/2 c packed brown sugar
  • 2 eggs
  • 1 tsp vanilla
  • 1/4 c sugar, for rolling
  • 32-34 Hershey Kisses, unwrapped (I used regular and caramel kisses.)
Directions:
  1. Preheat oven to 350F. Line baking sheets with parchment paper or silpat.
  2. Combine flour, baking powder and salt. Mix well and set aside.
  3. In low bowl, add 1/4 c sugar for rolling and set aside.
  4. In stand mixer bowl, add peanut butter and butter. Use paddle attachment and mix until smooth.
  5. Add brown sugar, eggs and vanilla and mix well.
  6. Reduce speed to low and gradually add flour mixture. Continue mixing until dough forms.
  7. Use a tablespoon to measure out cookie dough balls: one leveled tbs per cookie, roll into ball, roll each ball in sugar and place on lined baking sheet 2 inches apart.
  8. Bake 8-9 mins. Cookies are lightly browned and slightly puffed up. Do NOT over-bake!
  9. Remove from oven and gently press unwrapped Hershey Kiss in center of each cookie.
  10. Return to oven and bake another 2-3 mins or till cookies are golden.
  11. Cool 5 mins on baking sheets then transfer to wire rack to cool completely. ENJOY!
Source: Adapted from Hershey's Kitchens

Wednesday, July 28, 2010

Hiyashi Chuka: Chilled Chinese Noodles

I've been following several foodie blogs since the beginning of the year and one that I enjoy a lot is La Fuji Mama because she prepares so many Japanese dishes. My boys would be so happy if I'd make more Japanese dishes so I joined Rachael's group, Washoku Warriors. She posts a challenge every month and members have all month to try the challenge. Unfortunately, I missed the last two challenges because I haven't been checking my google mail account. Now that that account is linked to my iPhone, I won't miss any more challenges. :)

I went ahead and tried the last challenge anyways, Challenge #11: Chilled Noodles, so I could finally try a recipe out of my new cookbook, Washoku: Recipes from the Japanese Home Kitchen by Elizabeth Andoh. I made a chilled Chinese noodle salad called Hiyashi Chuka. My Obaa-Chan (Grandma) made it on hot, humid days when I used to visit Japan and my Mom also made this on hot summer days as it's a refreshing, cold noodle dish. Good stuff!

This was the first time I made this dish for my fam and they LOVED it! As I took each bite, my fun-filled memories of summer vacations in Japan came flooding back. I enjoyed my lunch as I reminisced about Japan and will definitely make this again. I hope to make it on a super scorcher of a day as it seems to taste better when enjoyed on a hot day. :) It's been extremely overcast and cold here in San Clemente, so when the sun decides to pop out and starts to feel like summer, I'll surely make this again.

Delish!

Hiyashi Chuka: Chilled Chinese Noodles

For the recipe, check out page 178 in the cookbook, Washoku: Recipes from the Japanese Home Kitchen by Elizabeth Andoh.

This is super easy and fast to put together. Make the dressing a day in advance as it will taste better, boil noodles, add dressing over the noodles, prep toppings and place over the noodles. Easy! I marinated the cucumbers in a little dressing hoping Son #2 and Hubby would eat the cucumber. It worked!

Monday, July 26, 2010

Sloppy Joes with Cheese Sauce

This is the second time I made Sloppy Joes for the boys and they enjoyed every bite. This is a super easy meal to throw together. Ridiculously easy! I really should make it more often because quick and easy meals fit right in with our busy schedule. :) 

I used hot dog buns this time and it held the sloppy joe mixture in the bun perfectly. No mess this time around because the boys ate every morsel of the filling. I'm pretty sure Son #1 licked his plate clean!


I served this with a salad and strawberries.

Sloppy Joes with Cheese Sauce

Yield: 4-5 servings

Ingredients:
  • 2 tsp extra virgin olive oil
  • 1/2 onion, diced
  • 1 tbs garlic, minced (Use less if you don't like food too garlicky.)
  • 1 lb ground beef
  • 4 hot dog buns (or bread of choice)

sauce:
  • 1- 14.5 oz can tomato sauce
  • 1 tbs white wine vinegar
  • 1 tbs Worcestershire sauce
  • 1/2 tbs garlic, minced
  • 2 tsp brown sugar
  • salt and pepper to taste

Directions:
  1. In a bowl, mix sauce ingredients and set aside.
  2. Heat oil in large skillet over med-high heat. Cook onions, garlic and ground beef until cooked through.
  3. Add sauce mixture to skillet and stir well. Bring to boil then reduce heat to low and simmer for 45 mins or till sauce reduces to a thick consistency.
  4. While meat/sauce mixture is simmering, make cheese sauce. See recipe below...
  5. Scoop sloppy joe mixture onto bun, top with cheese sauce and serve with salad. ENJOY!

----

Cheesy and delicious. The leftover cheese was perfect for nachos!

Cheese Sauce

Ingredients:
  • 2 tbs butter
  • 1 c milk
  • 1 tbs flour
  • 2 oz cream cheese
  • 3 c shredded cheddar cheese

Directions:
  1. In sauce pan, melt butter over med heat till melted. Then whisk in flour and cook for 1-2 mins.
  2. Add milk and stir well.
  3. Add cream cheese and cheddar cheese and cook until melted about 3-5 mins.
  4. Keep warm over low heat until ready to eat.

Friday, July 23, 2010

Barbacoa Beef

I wanted an easy crockpot meal with a little spice. I found a recipe for barbacoa beef and I was sold. Crockpot meals are easy and delicious and a great way to make TONS of food when feeding a crowd.  When feeding my fam of four, I freeze half the meat so I have cooked, ready-to-eat beef for enchiladas. Having cooked meats in the freezer allows you to make a quick home-cooked meal when you need it. Just throw the frozen ziploc baggie of meat in your fridge overnight and let it thaw. Use it the next day for enchiladas, tacos, sandwiches, on salads, quesadillas or nachos. It's SOOO easy!

Mmmm......

Taco time!

Barbacoa Beef

Yield: 8-10 servings

Ingredients:
  • 1-2 tbs extra virgin olive oil
  • 3-4 lb boneless chuck roast
  • 2 tsp chili powder
  • 1 tsp cumin
  • 1 tsp paprika
  • 2 c beef stock
  • 4 tbs tomato paste
  • 1-2 chipotle peppers in adobo sauce, minced
  • 2 sweet onions, one cut into eighths and the other diced
  • 2 tbs garlic, minced
Directions:
  1. Cut one onion into eighths and place in bottom of crockpot. Reserve diced onion for top of beef.
  2. Heat olive oil in large skillet over med-high heat. 
  3. Combine spices in bowl.
  4. Cover beef completely with spice rub. 
  5. When oil is hot, place beef in skillet and sear each side. DO NOT move the meat while it cookes 2-3 mins per side.
  6. Remove beef from skillet and place over onions in crockpot.
  7. In same skillet, over med-high heat, add beef stock and scrape up any browned bits. 
  8. Add tomato paste and minced chipotle and whisk into sauce. Bring sauce to boil, reduce heat and simmer till sauce has reduced and thickened slightly.
  9. Add diced onion and garlic on top of seared beef in crockpot. Pour sauce over onions, garlic and beef.
  10. Cover and cook on low for 6-8 hrs or high for 3-4 hrs.
  11. Remove beef from crockpot and shred with two forks. Use slotted spoon to remove onions. Add to shredded beef and mix well. Add some of the sauce if beef is dry.
  12. Make beef tacos. Top with salsa, tomatoes, onions, cilantro, cheese or hot sauce. ENJOY!

Wednesday, July 21, 2010

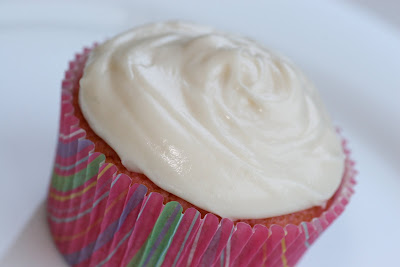
Strawberry Cupcakes with Cream Cheese Frosting

When I came home with several boxes of store-bought cake mixes, Hubby raised an eyebrow and asked why I bought so many boxes. I explained they were my emergency mixes and he gave me a very funny look and asked how cake mix is considered "emergency food." I obviously didn't mean a real emergency, but an emergency in the sense that when pressed for time, I can whip up a quick dessert. Everyone should have an emergency box of cake mix in their cupboard!  ;)

We enjoyed an impromptu barbecue at my parents' house in honor of my sister's birthday. I had just enough time to throw these cupcakes together. Good stuff!  

YUM!

Happy Birthday, E!

Strawberry Cupcakes


Yield: 24 cupcakes

Ingredients:

  • Strawberry cake mix
  • 7-Up, 12 oz
Directions:
  • Preheat oven to 350F and line muffin pan.
  • Place cake mix in stand mixer bowl. Mix on low.
  • Slowly add 7-Up, increase mixer speed and mix completely.
  • Using a Pampered Chef medium scoop, add a scoopful of batter in muffin liner.
  • Bake on middle rack for 20-25 mins or until toothpick inserted in center comes out clean.
  • Cool in muffin pan for 5 mins and then transfer cupcakes to wire rack. Cool completely before frosting. ENJOY!
Cream Cheese Frosting

Yield: frosts 18-24 cupcakes

Ingredients:
  • 6 oz cream cheese, softened
  • 1/2 stick butter, softened
  • 1 tsp vanilla extract
  • 1 1/2 c powdered sugar
Directions:
  1. Add first three ingredients in med-large bowl and mix on medium speed with electric mixer until light and fluffy.
  2. Add powdered sugar and mix until desired frosting consistency is reached. Be sure cupcakes are fully cooled before frosting. ENJOY!!!

Monday, July 19, 2010

Blueberry Banana Bread


My boys love banana bread. They love when I put chocolate chips in it but I wanted to make a healthier version and threw in some fresh blueberries instead. It was a great combination and turned out really good! Delicious!

Bursting with blueberries.

Banana bread smells sooooo good!

Blueberry banana goodness.

Blueberry Banana Bread

Ingredients:
  • 1/2 c sugar 
  • 1/2 stick butter
  • 3-4 bananas, mashed
  • 2 c flour
  • 1 tsp baking soda
  • 1 tsp salt
  • 1 1/2 c blueberries, frozen or fresh
  • 1/2 c chopped nuts (optional)- I avoid due to son's treenut allergies)
Directions:
  1. Pre-heat oven to 350F.
  2. Mix together sugar, butter and bananas. 
  3. In separate bowl, mix flour, baking soda and salt. Then add to banana mixture.  
  4. Add blueberries and mix gently. 
  5. Bake at 350F for ~1 hr. Test for doneness with toothpick.
  6. Cool completely before cutting and serving. ENJOY!

Wednesday, July 14, 2010

Buffalo Chicken Dip with Celery "Fans"

This is a delicious appetizer! The flavor of hot wings minus the mess yet cream cheesey so it's not too spicy. It's a great way to get friends and fam to eat their celery, too. :) For those who don't care for celery, serve with bread, crackers or tortilla chips. This was really good hot out of the oven but just as tasty when served cold on day 2. It was the perfect spread for sandwiches, too.

Yum.

Buffalo Chicken Dip with Celery

Yield: 3 cups

Ingredients:
  • 2 c cooked chicken, shredded and chopped
  • 3/4 c Buffalo wing sauce
  • 6-8 oz Neufchatel cheese, softened
  • 1 c Ranch dressing (I used fat-free sour cream)
  • 1/2 c shredded mozzarella cheese (I omitted)
Directions:
  1. Preheat oven to 350F.
  2. In stand mixer bowl, combine all ingredients and mix well.
  3. Transfer mixture to 8x8 baking dish.
  4. Bake for 30 mins or till heated through.
  5. Serve with celery, sliced bread, tortilla chips, crackers, etc..
~~~~~~~~~~~~~~~~~~~~~~~~~~~~~~~

To avoid double dippers from contaminating your dip, cut the celery into smaller 1-2" pieces and slice the ends into 3-4 skinnier stalks. Be sure not to cut all the way if you want the "fans." This way, you get more dip on your celery so there's no need to double dip!


Celery "Fans"

Ingredients:
  • celery
  • bowl of ice water
Directions:
  1. Set aside bowl of ice water.
  2. Wash celery and cut into 1-2" pieces. 
  3. Cut ends of those pieces into 3-4 skinnier pieces.
  4.  Place prepared celery into water and allow ends to "curl."
  5. Drain and dry before serving.
Source: Adapted from Sauce and Sensibility

Monday, July 12, 2010

Cilantro Lime Rice

My boys L-O-V-E rice and this side was a hit for sure! Super simple and delicious indeed. Great side for any dish. So versatile...love it!

Good stuff!

Cilantro Lime Rice

Yield: 4-6 servings

Ingredients:
  • 1 c extra long grain rice (or Basmati)
  • 2 c water
  • 1/2 tsp salt
  • 1-2 limes, juiced
  • cilantro, handful (more or less to taste) washed and chopped
  • 2-3 tsp Canola oil
Directions:
  1. In small heavy pot, add rice, water, 1 tsp oil and salt. Boil on high till most water evaporates.
  2. When water covers top of rice, reduce heat to low and cover 12-15 mins.
  3. Turn off flame and keep covered add'l 5 mins.
  4. In med bowl, combine cilantro, lime juice, rice and 1-2 tsp oil. Toss until thoroughly combined. ENJOY!
Source: Adapted from Skinny Taste

Friday, July 2, 2010

Pork Pasta Salad

A great way to use up leftover meat is to put it in a salad. I whipped up a tasty pasta salad for my high school's third annual all-class alumni picnic. I watched everyone eat it up and comment on how tasty it was. :) Awesome! It's a light dish, easy to make and delicious, too.

Bow ties.
Pork Pasta Salad

Yield: 10-12 servings

Ingredients:
  • 16 oz Farfalle pasta (bow ties or pasta of choice)
  • 1/2 red onion, diced
  • red, orange and yellow pepper, seeded and diced
  • handful cilantro, washed, dried and chopped
  • 1 c shredded pork (or meat of choice)
  • 1/2 - 1 c salad dressing of choice (I used Bernstein's Light Cheese Fantastico)
Directions:
  1. Cook pasta according to directions. Drain, place ice in large bowl of water and add pasta to stop cooking process. When pasta has chilled, drain again and set aside.
  2. Add chopped veggies, cilantro and pork. Mix well.
  3. Add salad dressing last and mix well. Start with 1/2 c and add more as needed. If too dry, add another 1/4 c just before serving.
Related Posts with Thumbnails