Friday, April 30, 2010

Double Chocolate Caramel Cookies

I had so much going on this past week. Between the craziness in our school district and the house projects that have been going on, it was a wacky week indeed. It's been stressful to say the least and I needed chocolate. I needed LOTS of chocolate! I needed something sweet and scrumptious to satisfy my sweet tooth and to comfort me during this weird week. These were brownie-like and absolutely DELISH. These double chocolate caramel cookies hit the spot! 

Yums.

A pool of sweet caramel.

Chococaramelicious.


Double Chocolate Caramel Cookies

Yield: 18 cookies

Ingredients:
  • 1 c flour
  • 1/2 c unsweetened cocoa powder
  • 1/2 tsp baking soda
  • 5 tbs butter, softened
  • 2/3 c sugar
  • 1/3 c plain yogurt
  • 1 tsp vanilla extract
  • 1/4 c mini chocolate chips
  • 1- 5 oz package Milk Duds
Directions:
  1. Preheat oven to 350F. Place parchment paper on baking sheet or use Silpat.
  2. In stand mixer bowl, add flour, cocoa powder, baking soda and combine well.
  3. Add butter, sugar, yogurt and vanilla. Mix on low until thoroughly mixed.
  4. Fold in chocolate chips and Milk Duds.
  5. Use Pampered Chef medium scoop and drop cookie dough on lined baking sheet about 2" apart.
  6. Bake 12-14 mins. Warning: the melted caramel is very hot and sticky. Cool before handling the cookies.
Source: Adapted from Martha Stewart Living, June 2005

Thursday, April 29, 2010

Taco Soup

It was a cold, overcast day and I wanted something to warm me up. Our painters already painted the exterior of our home and today they were working on all the doors. Though they closed the doors as much as they could, they couldn't close the doors all the way till the paint dried. It was drafty and I was freezing. I thawed homemade chicken stock and made Taco Soup. It hit the spot for sure! The soup I served my fam had all the fixin's...shredded cheddar cheese, sour cream, crunchy chips and jalapeño slices for Hubby. OHHHHH....YUMMY!

I love soup.

Taco Soup

Yield: 4-6 servings

Ingredients:

soup:

  • 3-4 c chicken stock
  • 1-2 c chicken breast, cooked and cubed
  • 1- 15 oz corn
  • 1- 15 oz refried black beans
  • 1/2 packet Taco Seasoning
toppings:
  • avocado, bite size
  • cheddar cheese
  • crushed tortilla chips
  • sour cream
  • jalapeño slices
  • cilantro, chopped
  • Tapatio
Directions:
  1. Add soup ingredients to large stock pot and heat over med heat. Stir occasionally.
  2. If you need to cook the chicken for the soup, do the following: boil pot of water, dice raw chicken tenders and poach for 5 mins or till done. When cooked through, strain out chicken and add to soup ingredients.
  3. Simmer soup on low for 1+ hrs. The flavors will meld together nicely the longer it simmers. :)
  4. Dish out soup, add toppings and serve. ENJOY!!!

Wednesday, April 28, 2010

Oatmeal Fudge Bars

Several years ago, we were visiting Monterey and we popped into a vegan cafe. I wasn't experienced with egg-free baking at that time so I was excited to get something special for Son #2. Unfortunately, his muffin was dry and tasted awful. I've never eaten cardboard but that muffin was exactly what I imagined cardboard would taste like. :(

Since then, I've learned how to bake egg-free goodies and the treats turn out pretty tasty. :) I also found The Food Allergy Mama a few months ago and she posts recipes for dairy, egg and nut-free goodies. Son #2 can have dairy so I use milk and/or butter but the dairy-free versions are great when I bake for my vegan friends.

I was in the mood for chocolate and I needed something rich and satisfying. These oatmeal fudge bars were fudgey and fantastic! This was exactly what I needed for my chocolate fix. It was a hit with the fam and easy to make. I'll definitely make this again when the wicked chocolate craving comes back in full force.

The cooling period is the hardest part of baking.

Fudge-ilicious!

SO delicious!

Oatmeal Fudge Bars

Yield: 16 squares from 8x8" dish

Ingredients:

oatmeal layer:
  • 1/2 c shortening
  • 1 c brown sugar, packed
  • 1/4 c unsweetened applesauce
  • 1 tsp vanilla
  • 1 c flour
  • 1/2 tsp baking soda
  • 1/2 tsp salt (I omitted)
  • 2 c quick cook oats
fudge layer:
  • 1/2 c flour
  • 1/4 c sugar
  • 1 1/2 c chocolate chips
  • 4 tbs butter
  • 1 tbs water
Directions:
  1. Preheat oven to 350F and spray 8x8" dish with baking spray. Set aside.
  2. Make oatmeal layer. In mixer bowl with paddle attachment, mix shortening and sugar till light and fluffy.
  3. Add applesauce and vanilla. Mix well.
  4. Add flour and baking soda to shortening mixture. Combine thoroughly.
  5. Stir in oats.
  6. Set aside 1 c oatmeal mixture for topping.
  7. Spread remaining oatmeal mixture into prepared baking dish. Spread well and pat down.
  8. Make fudge layer. In microwave safe bowl, melt chocolate chips and butter in 30 second increments till chocolate has melted. Stir well before microwaving for another 30 seconds. 
  9. Add water and stir till combined.
  10. Add flour and sugar to chocolate and stir till thoroughly combined. 
  11. Spread fudge layer over oatmeal layer.
  12. Spread remaining oatmeal mixture over fudge layer.
  13. Bake 20-25 mins or till lightly browned.
  14. Cool completely before cutting into squares. ENJOY!

Tuesday, April 27, 2010

Panna Cotta

My boys LOVE dessert. Ok, ok, I love desserts, too. That's the best part of the meal in my opinion. :) I wanted an Italian dessert for my in-laws' 41st anniversary dinner and made panna cotta for the first time. The texture was definitely not like Trader Joe's Panna Cotta that my Mom always has in her freezer. Panna cotta is perfect for Son #2 because it's an egg-free treat that he can enjoy. I've been wanting to make it for quite some time so the anniversary dinner was my perfect opportunity.

I found a post for panna cotta but my first batch was super stiff. It wasn't the soft, creamy texture like TJ's panna cotta so I was determined to figure out how I could make it better. I had to try again! I found another recipe but that turned out too soft and fell apart when I took it out of the mold. I think I know how to make it perfect next time. Three's a charm, right? Will share when I do! 

This was as firm as a jello jiggler.
Topped with fresh strawberries, this was still yummy.
I only have Trader Joe's Panna Cotta to compare it to so maybe this is what "real" panna cotta is supposed to be like. I have no idea but we ate it up. Every last bite!

My second attempt was more like TJ's panna cotta except it was too soft and fell apart.
I topped it with homemade plum preserves. Yum!
I'll have to try it again to get the consistency right. :)

Panna Cotta...take 1

Yield: 4 servings (I got 6 in smaller "ramekins.")

Ingredients: 
  • 2 c heavy whipping cream
  • 3/4 c sugar
  • 2 tsp vanilla extract (or 1 vanilla bean)
  • 1 oz Knox gelatin (this was way too stiff...I think I should've used 1 packet from the box of 4)
  • 2 tbs cold water
  • fresh strawberries, sliced and sugared
Directions:
  1. In med. bowl, add cold water and sprinkle gelatin on top and set aside.
  2. Slice strawberries, add a sprinkle of sugar and set aside.
  3. Place cream and sugar into sauce pan over med. heat. Add vanilla and stir frequently.
  4. Prepare ramekins/custard cups. Spray lightly with cooking spray.
  5. Cook until it starts to boil and then remove from heat.
  6. Pour cream mixture over gelatin mixture. Stir gently till combined.
  7. Divide into prepared ramekins/cups. Place in fridge for 2 hrs or till firm.
  8. To serve, run butter knife around edge of cups and invert onto serving plate.
  9. Garnish with fresh fruit or topping of choice.
Source: Adapted from bell'alimento

Panna Cotta...take 2

Yield: 4 servings

Ingredients:
  • 1 tbs cold water
  • 1 tsp Knox gelatin (this didn't firm up the panna cotta...I should've used the entire packet)
  • 1 c half and half
  • 1/2 c milk
  • 1/4 c sugar
  • 1 tsp vanilla extract
  • 1/2 c sour cream (I omitted because I only had fat-free and the recipe calls for full fat)
  • 1 tbs plum preserves, or topping of choice
Directions:
  1. Place water in cup and sprinkle gelatin over water.
  2. In med. sauce pan over med. heat, warm half and half and milk with sugar and vanilla. Take off heat when it starts to boil.
  3. Pour over gelatin mixture and mix well till combined.
  4. Add sour cream and stir until smooth.
  5. Pour into ramekins and refrigerate 2 hrs or till firm.
  6. To serve, run butter knife around edge of cups and invert onto serving plate. 
  7. Garnish with fresh fruit or topping of choice.
Source: Adapted from Piece of Cake

Monday, April 26, 2010

Chicken Piccata

Here's the chicken piccata recipe from my in-laws' 41st wedding anniversary dinner. I thought I had chicken breasts in the fridge but they were actually thighs. It was too late to run out and get chicken breasts so I made chicken piccata with thighs. It was delicious! We ALL loved this!

Oh, capers!


My in-laws LOVED their special dinner I made them. :)

Chicken Piccata

Yield: 6-8 servings

Ingredients:
  • approx. 15 boneless, skinless chicken thighs
  • 3 tbs grated Parmesan cheese
  • 1/3 c flour
  • salt and pepper 
  • 3-4 tbs extra virgin olive oil
  • 2 tbs butter (I omitted)
sauce:
  • 2 tbs butter (I omitted)
  • 3/4 c white wine
  • 4 tbs Meyer lemon juice
  • 1/4 c capers (I like to add more)
  • handful parsley, chopped (I forgot to add it)
Directions:
  1. Mix Parmesan, flour, salt and pepper in a low bowl.
  2. Rinse the chicken and pat dry. Dredge in flour mixture until well coated.
  3. Heat oil and 2 tbs butter in large skillet on med-high heat. Add chicken pieces but do not crowd the pan. Brown well on each side about 3 mins per side.
  4. Remove chicken from pan and keep warm in oven. Cook rest of chicken and keep warm.
  5. When all chicken has been cooked, prepare the sauce. Add wine, lemon juice and capers to same skillet. Use spatula to scrape up browned bits. Reduce sauce by half then add 2 tbs butter.
  6. Plate chicken and serve with sauce. Sprinkle with parsley.
Source: Adapted from Simply Recipes

Friday, April 23, 2010

Simple Spaghetti

Ok, so this side dish is ridiculously easy and delicious. Simple to whip up, yet oh so flavorful. Try it. I bet you'll LOVE it! I didn't have any leftovers so it was obviously a hit. I've come to realize that pasta does not have to be drenched in marinara sauce to be good. I LOVE sauce, however, a "light" pasta is perfect when you're serving it as a side with more flavorful main dishes. It's delicious and not overpowering. Good stuff!

Light and fresh.

This pasta was the perfect side dish for my in-laws' 41st anniversary dinner.

Simple Spaghetti

Yield: 4-6 servings

Ingredients:
  • 1 lb thin spaghetti noodles
  • 8-10 sundried tomatoes in oil, chopped
  • handful of basil chiffonade
  • extra virgin olive oil, to taste
  • salt, pepper and/or crushed red peppers, optional
Directions:
  1. Cook pasta according to directions. Drain and put in large serving bowl.
  2. Chop sundried tomatoes (with the oil) and prep basil chiffonade. Add to pasta and stir well. Add a splash of extra virgin olive oil if needed.
  3. Keep pasta mixture warm till ready to serve.

Thursday, April 22, 2010

Eggplant Salad

I LOVE eggplant but the rest of my fam aren't big eggplant fans. Son #2 is allergic to eggs, and though eggplant is not "egg," I think the name alone makes him shun the veggie. Since Hubby's not an eggplant eater either, I only make eggplant when we have friends or family over. 

April 12th was my in-laws' 41st wedding anniversary. Forty-one years...AMAZING, right?! :) We invited them over for their celebratory dinner. On the menu was eggplant salad, thin spaghetti with sundried tomatoes and fresh basil, chicken piccata, panna cotta and oatmeal fudge bars. Everything was delicious. :) 

I LOVE this!

Eggplant Salad

Yield: 4-6 servings

Ingredients:
  • 1 large eggplant, roasted or grilled and cut into bite-size pieces
  • 2 tomatoes, seeded and chopped
  • 1/3 c red onions, diced
  • handful of basil chiffonade
  • (This is also very tasty with grilled/roasted 1-2 yellow squash and 1-2 zucchini.)
dressing:
  • 2 tbs red vinegar
  • 2 tbs balsamic vinegar
  • 3 tbs extra virgin olive oil
  • 3 cloves garlic, minced (more or less to taste)
  • sea salt to taste
Directions:
  1. Slice eggplant into 1/2" slices and spray with oil. Grill or roast till tender. If adding squash and zucchini, do the same and grill/roast together. Dice into bite-sized pieces.
  2. In med-large mixing bowl, add all chopped veggies and basil, too.
  3. Add dressing ingredients to veggies and toss gently.
  4. Eat immediately or chill in fridge and eat as a cold salad. Warm or cold...it's delicious! ENJOY!
Serving suggestion: Eat as is, on a salad, mixed in with pasta, with crackers or on toast. Yum.

Wednesday, April 21, 2010

Best Burger Buns

I found a post for light brioche burger buns and saved it knowing I'd make them at some point. I've been baking sandwich breads for my fam since January and even made Indian Pav (white dinner rolls) a couple weeks ago. I wanted to try homemade hamburger buns, too. Glad I made the buns because they were GREAT!

There's nothing wrong with store-bought buns but I've found that the tasty buns from the bakery are usually ginormous and are more bun than I want to eat. They're too carbolicious and not waist-line friendly. I don't care for the smaller, bagged buns from the bread aisle as I don't think they taste very good. Hmmm...maybe I'm like my Dad and I'm a bread snob, too. I've been hooked on homemade bread because it's delicious so I was looking forward to trying homemade hamburger buns.

According to Wikipedia, "brioche is a highly enriched French bread, whose high egg and butter content give it what is seen as a rich and tender crumb. It has a dark, golden, and flaky crust from an egg wash applied after proofing." Well, Son #2 has severe egg allergies so I adapted the recipe so he could enjoy the buns, too. They were fantastic! Once again, I was pressed for time to get these on the table in time for dinner so I did my "rapid rise method" (it worked for the dinner rolls I made) and they turned out fine.

Ready for the second rise.

Transferred rolls to one baking sheet and set aside to cool.

Perfect.

Best Burger Buns

Yield: 8 buns, 4-5" in diameter

Ingredients:
  • 3 tbs warm milk
  • 1 c warm water (if it's too hot, it'll kill the yeast)
  • 2 tsp rapid rise yeast
  • 2 1/2 tbs sugar
  • 1/2 tsp salt
  • 3 c bread flour
  • 1/3 c all purpose flour
  • 2 tbs butter, softened
  • (honey and toasted sesame seeds for topping)
Directions:
  1. In stand mixer bowl, add milk, water, yeast, sugar and salt. Use paddle attachment and mix to combine. Add flours and mix on low until incorporated. 
  2. Switch to dough hook and add butter. Knead on low for 8-10 mins. 
  3. Lift dough out of bowl and lightly spray the bowl with oil. Put dough back in bowl and cover with clean, damp towel. Let rise in warm, draft-free area till doubled in size about 1 hr. If rushed, turn on your countertop convection/toaster oven to "warm" and place bowl with dough on top of unit. Let rise for 30-40 mins.
  4. Line baking sheet with parchment paper. 
  5. Lightly flour Roul'Pat and roll out dough after it doubled in size into rectangular shape. Use a pizza cutter and gently cut dough into 8 equal parts. 
  6. Roll each portion into ball and place on baking sheet. Place buns 2-3" apart. Let rise again for 1 hr until nearly doubled in size again. If using "rapid rise method," set countertop convection/toaster oven to "warm" and place baking sheet with rolls on top of unit. Let rise for 30-40 mins.
  7. Fill 13x9" pan with water and place on bottom rack. Preheat oven to 400F and put empty rack in center. 
  8. Brush tops of buns with honey and sprinkle with toasted sesame seeds.
  9. Bake for 15 mins or till tops are golden brown.
  10. Cool completely then ENJOY! I made yellowtail "burgers" for these buns. SOOO yummy!
Source: Adapted from Smitten Kitchen

Tuesday, April 20, 2010

Yellowtail "Burgers"

When Friend had website problems and Hubby helped him, he gave us TWO yellowtail fillets to thank Hubby for his 5+ hours that were spent recovering his site. We grilled the first fillet and that was tasty! I used my food processor for the second fillet and made "burgers" with it. I also made a spicy cocktail sauce spread and homemade buns, too. DELISH! Oh, yes, indeed it was! I'll most definitely make this again!

Raw yellowtail mixture. 
My boys asked if we could make handrolls with this.
Maybe next time...

I should've used more spray oil.

Love the grill marks! They look painted on. :)
DEEEEEELISH!

Grilled yellowtail "burgers" on a homemade bun.

Serve with potato salad, carrot sticks and a salad.
YUMS!

Yellowtail "Burgers"

Yield: 6 patties

Ingredients:
  • 1 yellowtail fillet
  • handful of parsley
  • 1 orange bell pepper, roasted
  • 1/4 c red onion, diced
  • 1/2 c panko bread crumbs
sauce:
  • 2 tbs sake (Japanese rice wine)
  • 2 tbs soy sauce 
  • 1 tbs Hoisin sauce
  • 1 tbs rice wine vinegar
  • 1/2 tbs sesame oil
  • 2 tsp garlic, minced
  • 2 tsp ginger, minced (use less or omit if you're not a ginger fan)
  • 1/2 tbs sugar
Directions:
  1. Make sauce and set aside.
  2. Cut fillet into smaller pieces and pulse in food processor till fish is a smooth consistency.
  3. If there's room in the food processor bowl, add parsley, bell pepper, red onions and pulse some more. Otherwise, remove half the fish to make room for veggies. Pulse till combined well.
  4. Put yellowtail mixture into med-large mixing bowl and add sauce. If making immediately, add the panko crumbs and mix thoroughly. I marinated the yellowtail/sauce mixture overnight and added the panko just before making the patties. 
  5. When panko is mixed in, make patties. I had enough yellowtail to make 6.
  6. Heat grill and cook patties on 3-4 mins per side till done. I cooked for about 12-15 mins total over med-low heat.
  7. Prepare buns with spicy cocktail sauce spread (recipe below), lettuce and red onions. Add yellowtail patties and be prepared for awesomeness. ENJOY!
~~~~~~~~~~~~~~~~~~

I wanted a spread for the buns and wanted to avoid mayonnaise. I had a little spicy cocktail sauce leftover so I used the sauce and a little sour cream to thicken it up. It was the perfect spread.

S P I C Y


Spicy Cocktail Sauce

Yield: 1/2 c (should be enough for 1 - 1 1/2 lbs of shrimp)

Ingredients:
  • 1/2 c ketchup
  • 1 tbs horseradish
  • 1/2 tsp chili powder
  • 1/2 tsp cayenne
  • 2-3 tbs Meyer lemon juice
  • 1 tsp Worcestershire Sauce
  • salt and pepper to taste
  • (sour cream if making a thick spread)
Directions:
  1. Mix ingredients in med bowl.
  2. This is spicy cocktail sauce. If it's too spicy for you, add more ketchup to mellow it out.
  3. If making a spread for fish, sandwich or burger, mix equal parts cocktail sauce and sour cream. It gives the spread a nice creamy texture without added fat from a mayonnaise-based sauce.

Monday, April 19, 2010

Yummy Yellowtail

A neighbor friend came over desperate for Hubby's help. Friend has a website, Cure Well Custom Bait Receivers, that went offline, and with an ad coming out the following week, he had to get it up and running again. He wasn't sure if Hubby would be able to help because he already spent four hours on the phone with tech support and got nowhere. Talk about frustration! Well, lucky for Friend because Hubby is a super smart software engineer and an excellent bug tracker. He looked at the code, checked here and there, fixed this and that, copied here to there and fully recovered the site. PHEW! It was a super obscure problem and took about five hours from start to finish. Good job, Hubby! Check out Friend's site...he makes a super cool product!

Friend fishes a lot and gave us TWO fresh yellowtail fillets as a thank you. I grilled one of the fillets for dinner. Yum yum!

Fresh fish...deeeee-lish!!!

Served with sauteed chard and potato salad.

Yummy Yellowtail

Yield: 4-5 servings

Ingredients:
  • 1 yellowtail fillet
  • 1/2 tbs sesame oil
  • 1/2 tbs Hoisin sauce
  • 1 tbs ginger, minced
  • 1 tbs garlic, minced
  • 1/4 c red onion, diced
  • salt and pepper to taste
  • lemon, optional
Directions:
  1. Cut a piece of foil big enough to wrap fish in. Wash and dry fish and place on foil.
  2. Drizzle sesame oil and Hoisin sauce over fish.
  3. Heat grill on low.
  4. Mix ginger, garlic, red onion, salt and pepper in a small bowl. Spread evenly over fish.
  5. Wrap fish and use a second piece of foil if needed.
  6. Grill over low heat for 15-18 mins. 
  7. Dish out, squeeze a little lemon juice on top, serve with rice, salad, veggies and ENJOY! 

Friday, April 16, 2010

German-Style Potato Salad

In my beautiful basket of organic fruits and veggies were 6 small Yukon gold potatoes. When I got the email from South Coast Farms with recipes for the basket contents, I was pleased to see one for potato salad. I like potato salad but only eat it at summer picnics. Since Son #2 can't eat mayonnaise due to his egg allergy, I was happy to get a mayo-free potato salad recipe. Yippee! He's not a potato fan (he's probably the only kid that doesn't like french fries) but I try to expand his potato palate when I can and my challenge is to find a potato dish he likes. No success as of yet but I'll keep trying. He probably thinks they're too bland as he loves flavorful fruits and veggies. 

Hubby really liked the potato salad. The addition of the white wine vinegar gave the potato salad that sour taste that is common with German potato salad. Unfortunately, I didn't have bacon that's also typical in German-style potato salad but this modified version was still tasty. 

I overcooked the potatoes a bit so when I mixed the wet ingredients into the potatoes, it became a bit of a mashed salad. It wasn't intentional but I liked it a lot. It still had some bite-sized chunks of potatoes yet also had a creamy, soft texture from the mashiness. Now that I think of it, the texture was very much like that of Japanese potato salad. We liked this. :)

Yum.

German Potato Salad

Yield: 4-5 servings

Ingredients:
  • 6-8 small Yukon gold potatoes (1 1/2 - 2 1/4 inches in diameter)
  • 1 tbs Dijon mustard
  • 1/8 c white wine vinegar
  • 1/2 c extra virgin olive oil (I used 1/4 c)
  • 4 strips bacon, cooked and chopped (I omitted as I didn't have bacon)
  • 1 tsp fresh rosemary (I used a handful of chopped parsley instead)
  • 1/2 c yellow onion, diced (I used red onion)
  • salt and pepper to taste
Directions:
  1. Boil a stockpot of water.
  2. Peel and cube potatoes into bite-sized pieces. Boil for 8-10 mins or until fork tender yet firm to the bite. Drain and set aside.
  3. Mix remaining ingredients in med. bowl.
  4. Pour wet ingredients over potatoes and toss gently.
  5. Great served warm or cold. ENJOY! 
Source: Adapted from South Coast Farms' recipe.

Thursday, April 15, 2010

Chinese Chicken Salad

This Chinese Chicken Salad is great! I fell in love with the sweet and crunchy flavors of the salad when a family friend brought it over for a potluck dish to our housewarming party back in 2001. I've changed it up a bit over the years but we love it and it's always a hit with friends and family. The boys love it and they'll eat all their veggies with a little Chinese dressing poured over it. When I add all the fixins, this salad is just as good as any Chinese Chicken Salad from a restaurant. Maybe even better. For reals.

I ate my cabbage salad without the toppings and it was very yummy nonetheless.
I usually add a bunch of ingredients to round out the salad but I was in the mood for a simple salad.
If you make a cabbage salad, it will keep well even after it's been tossed in dressing.

Chinese Chicken Salad

Yield: 4-6 servings

Ingredients:
  • 1 bag coleslaw mix of cabbage and carrots (green leaf lettuce tastes great, too)
  • 1 small can mandarin orange slices, drained (or diced apples)
  • 3-4 green onions, chopped
  • 1-2 cooked chicken breasts, sliced or shredded (or cubed firm tofu)
  • 2.25 oz package almonds, sliced/slivered and toasted (I omit due to Son #2's allergies)
  • 1-2 tbs sesame seeds, toasted
  • 1 package Top Ramen (I use chicken flavor), crumble DRY noodles and toast (use seasoning packet for dressing, optional...salad dressing recipe below)
Directions:
  1. Make Chinese dressing (see recipe below) and refrigerate. Dressing tastes great if made a day in advance.
  2. Toast almonds, sesame seeds and crumbled DRY noodles until slightly browned. Set aside.
  3. In a large bowl, add all salad ingredients but reserve a little bit of the ingredients for garnish. Makes for a nice presentation when you add remaining ingredients after the salad's been tossed. :)
  4. Add 1/8 c dressing (more or less to taste) and toss well. If unsure of dressing amount, always start with a little to avoid drowning your salad.
  5. Transfer to serving bowl, garnish with remaining ingredients and ENJOY!
~~~~~~~~~

Then, there's the dressing. It's SO darn delicious!

This dressing is great on salad, veggies and as a marinade, too.

This is TASTY dressing! It's so easy to make and tastes just as good as store-bought. Actually, I think it tastes better! I've made the dressing with and without the Top Ramen seasoning packet and both versions taste great. To cut down on the amount of sodium, I've been omitting the seasonings lately and nobody's called me out on it yet. This is your typical Chinese salad dressing from the restaurants. At least I think so. ;)

This dressing is great on veggies, too. We invited our friends over for dinner and I made a side of asparagus and tossed it with Chinese dressing. It was the perfect side dish to serve with grilled General Tso's chicken thighs. Just cook the asparagus and toss in dressing. Easy and delicious! YUM.

Chinese Dressing

Yield: ~ 6 oz

Ingredients:
  • 2 tbs sesame oil
  • 2 tbs sugar
  • 6 tbs rice vinegar
  • 1 tbs soy sauce
  • salt and pepper to taste (or use Top Ramen Chicken Flavor seasoning packet)
Directions:
  1. Add all ingredients in a container with lid. One with a pour spout works great.
  2. Shake well and keep refrigerated. ENJOY!
Source: Adapted from family friend, M.V.. 

Wednesday, April 14, 2010

Banana Oat Cookies

I wanted a light and healthy dessert to serve at our dinner get-together with friends. I had two very ripe bananas so I opted for banana cookies. I wanted something sweet yet healthy so these were perfect. These definitely tasted "healthy" but the sweetness from the chocolate chips made them seem "desserty." Great stuff in my opinion and guilt-free when eating two or more cookies. :) My boys loved these, and when they kept asking for more, I had no problems letting them eat 'em up. This was very similar to the banana bars I made but I changed the ingredients a little and baked in cookie form. Yums. :)

My Pampered Chef medium scoop was perfect for cookies.

Next time, I'll press them down just a bit to make more of a cookie shape. 

Banana Oat Cookies

Yield: 18 cookies

Ingredients: 
  • 2 ripe bananas
  • 1 tsp vanilla extract
  • 2 c quick oats
  • 1/3 c shredded and sweetened coconut
  • 1/3 c flax seeds
  • 1/3 c flour
  • 1/2 tbs cinnamon
  • 1/2 tsp salt
  • 1 tsp baking powder
  • 1/3 c chocolate chips
Directions:
  1. Preheat oven to 350F.
  2. In large bowl, mix bananas and vanilla.
  3. Add oats, coconut, flax seeds, flour, cinnamon, salt and baking powder to same bowl. To avoid making another bowl dirty, I mix the dry ingredients carefully and then mix thoroughly into the banana mixture. All ingredients should be combined well.
  4. Gently fold in chocolate chips. 
  5. Line baking sheet with parchment paper and drop spoonfuls (use Pampered Chef medium scoop) of dough onto baking sheet about 1" apart.
  6. Bake for 13-15 mins. 
Source: Adapted from 101 Cookbooks

Tuesday, April 13, 2010

Feta and Red Pepper Dip

We invited friends over for dinner and I wanted to serve a dip of some sort. Since I still have Costco-sized Feta Cheese, Sundried Tomatoes and a mixture of red, orange and yellow peppers, I wanted to incorporate all of that into our dinner menu. I made a Greek feta dip and served it with fresh peppers, carrots and crackers. It got rave reviews from our friends. Because it was so good, I made another batch the next day for our family get-together but used yellow peppers as I was out of the red ones. It was just as tasty as the red pepper batch and I got lots of compliments from the extended fam, too. Yummy yum yum! This has a nice kick...it's similar to Daphne's Greek Cafe's Fire Feta spread. I'll try that next time with homemade gyros. :)

The chilis give the dip a fabulous kick!

Feta and Red Pepper Dip (Htipiti)

Yield: 8 servings

Ingredients:
  • 8 oz feta cheese
  • 2 red peppers, seeded and roasted (This was good with roasted yellow peppers, too.)
  • 2 serrano chilis, seeded and roasted
  • 6-8 sundried tomatoes in olive oil
  • 1 tbs garlic, minced
  • 2 tbs lemon juice
  • 1/4 c kalamata olives, diced
Directions:
  1. Remove seeds from peppers and chilis. Slice peppers and roast peppers and chilis at 350 for 30 mins.
  2. Add ingredients in food processor and process until smooth consistency is reached. If mixture is too thick and not blending well, add 1 tsp of extra virgin olive oil.
  3. Top with diced kalamata olives before serving.
  4. Enjoy with crackers, veggies, spread on a sandwich or a gyro.
Source: Adapted from Closet Cooking

Monday, April 12, 2010

Turkey Sloppy Joes

My boys LOVE pasta with ground turkey marinara sauce. I wasn't in the mood for pasta and wanted to make something different with the ground turkey that was in my fridge. I was happy to find a post for cheesy sloppy joes. The only time I've eaten a sloppy joe was at a friend's house when I was little. I remember loving the sauce and the messiness of it all. I love tomatoes and all things ketchupy so I'm surprised I didn't make these sooner. 

I made homemade rolls for the sloppy joes and a cheese sauce to top it off. My fam gobbled these up! I'll definitely make these again soon. This was easy to prepare and delicious, too!

Delicious.

Turkey Sloppy Joes with Cheese Sauce

Yield: 4-5 servings

Ingredients:

  • 2 tsp extra virgin olive oil
  • 1/2 red onion, diced
  • 1 lb ground turkey
  • 4 hamburger buns (I made rolls)
  • cheese sauce (recipe below...optional)

sauce:
  • 1- 14.5 oz can tomato sauce
  • 1 tbs white wine vinegar
  • 1 tbs worcestershire sauce
  • 1/2 tbs garlic, minced
  • 2 tsp brown sugar
  • salt and pepper to taste
Directions:
  1. In a bowl, mix sauce ingredients and set aside.
  2. Heat oil in large skillet over med-high heat. Cook onions and ground turkey until cooked through. 
  3. Add sauce mixture to skillet and stir well. Bring to boil then reduce heat to low and simmer for 45 mins or till sauce reduces to a thick consistency.
  4. While meat/sauce mixture is simmering, make cheese sauce. See recipe below...
  5. Scoop sloppy joe mixture onto bun, top with cheese sauce and serve with salad. ENJOY!
Source: Life's Ambrosia

----

The cheese sauce was yummy and a nice addition to the sloppy joes. This cheese sauce would also be great over chicken or as a dip with veggies. Good stuff! Because the sauce was creamy and white, Hubby was a little worried about what it was composed of. I told him it was cauliflower cheese and the boys played along. It was fun to watch him sniff the cheese repeatedly and try small tastes off his fork. He is NOT a cauliflower fan, and though this cheese sauce had no cauliflower in it whatsoever, he was wary of what was in it. The next time I make this, I will try adding a little pureed cauliflower in lieu of cream cheese. It'd probably be the same consistency and be a healthier alternative to the cheese sauce. :) I'll update this post when I make the real cauliflower cheese sauce. Muwahahahhahaha!

Cheese Sauce

Ingredients:
  • 2 tbs butter
  • 1 c milk
  • 1 tbs flour
  • 2 oz cream cheese
  • 3 c shredded cheddar cheese (I used 2 c jack cheese)
  • salt and pepper to taste
Directions:
  1. In sauce pan, melt butter over med heat till melted. Then whisk in flour and cook for 1-2 mins.
  2. Add milk and stir well.
  3. Add cream cheese and cheddar cheese and cook until melted. Add salt and pepper to taste.
  4. Keep warm over low heat until ready to eat.
Source: Adapted from Life's Ambrosia

Friday, April 9, 2010

Rolls (Indian Pav)

OH MY GOSH! I found a super delicious recipe for rolls. OH MY!!! Let me tell you...these rolls are great to serve with dinner, but seriously, they're good eats anytime of day! Fresh out of the oven, they were soft, pillowy and sweet. I split a hot roll and put a dollop of plum preserves on each half for my boys to try. Son #1 kept calling them pastries because they were so sweet and delicious. :) They were really good!

This was my first batch of rolls and they were a hit. They were easy to make and worth the effort for sure. This is SUPER EASY if you have a KitchenAid Stand Mixer. Add the ingredients to the mixer bowl and let it do its thing. Easy peasy. Homemade bread is perfect for Son #2 because he has food allergies and I know exactly what ingredients are going into it.

I found this recipe at Chef In You, a vegetarian/vegan site. This recipe for Indian Pav (sounds so much fancier than "dinner rolls") is delish. I was a bit rushed to make these rolls quickly so we could eat them for dinner so I shortened the rise times significantly. I turned on my countertop convection oven to "warm" and placed the covered bowl of dough on top of the unit so the dough would rise faster. I've never done that before so I wasn't sure if that would work but it worked for me. I only did a 30 min rise time and they still fluffed up and turned out great. Yay! :) My "rapid rise method" worked!

Set aside to rise.

Browned and ready to be eaten up.

Perfect 4" roll.

Straight out of the oven and topped with homemade plum preserves. TASTY!

Anytime Rolls (Indian Pav)

Yield: 12 rolls, about 3-4" round

Ingredients:
  • 3 c bread flour (I used 1 c bread flour and 2 c all purpose flour because that's what I had)
  • 2 1/4 tsp dry active yeast (1 packet)
  • 1/4 c lukewarm water
  • 1 1/4 c milk
  • 3 tbs butter
  • 2 tbs sugar
  • 3/4 tsp salt
Directions:
  1. Warm milk to lukewarm (not hot), add butter and let it melt. Set aside.
  2. Warm water to lukewarm, add yeast and sugar. Make sure water is NOT too hot or it will kill the yeast. Stir and set aside 10 mins until frothy.
  3. Add milk mixture and salt to yeast mixture and stir well.
  4. Add bread flour to stand mixer bowl and use paddle attachment. Turn on low speed.
  5. Slowly add milk/yeast mixture to flour until thoroughly combined.
  6. When mixture is sticky looking, remove paddle and use bread hook attachment. Turn on low and knead for 10-15 mins.
  7. When done, dough should be soft and slightly sticky.
  8. Spray stand mixer bowl with spray oil and put dough back into bowl. Cover with damp towel and set aside in warm place free of drafts for 1 hr or until doubled in size. 
  9. Turn out dough on floured Roul'pat and roll out into rectangle.
  10. Use pizza cutter wheel and carefully cut into 12 pieces. Spray baking sheet with spray oil.
  11. Roll each piece to form a ball and place side-by-side on baking sheet. Leave 1 1/2 - 2" space between rolls. Set aside for 30 mins to double in size. They'll be touching...let them be.
  12. Preheat oven to 350F. When oven's ready, bake rolls for 20-30 mins till golden brown. Cool for 3-5 mins before serving.
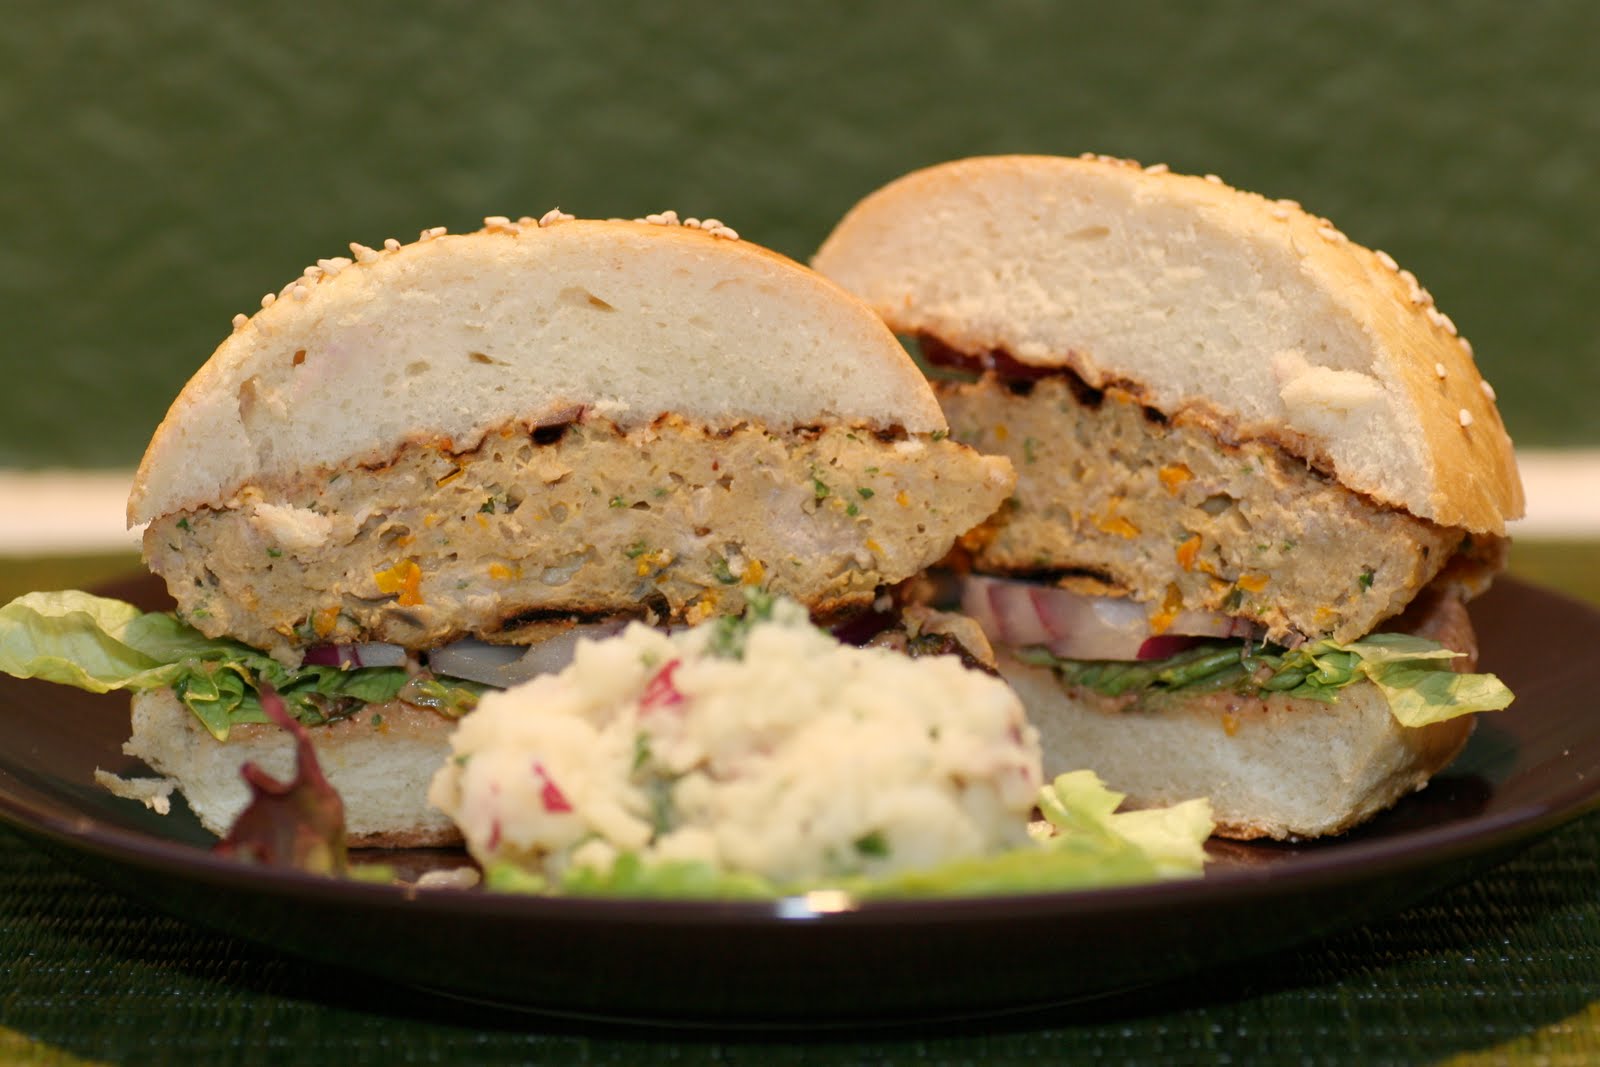
  13. Enjoy plain, with butter, jam, soup/salad or make mini sandwiches. I made these for sloppy joes. I'll post that recipe next. YUM!!!
Source: Chef In You

Thursday, April 8, 2010

Feta Tomato Chicken

I love shopping at Costco. They have great deals and great products. A couple Costco trips ago, I bought sundried tomatoes and feta cheese because I was in the mood for Greek pizza. I haven't gotten around to making that yet but I've still been in the mood for sundried tomatoes and feta. With two chicken breasts in my fridge that had to get baked today, I decided to make a Greek-inspired chicken with feta and sundried tomato filling. It was a little dry so I'll try pan frying it next time or make a sauce to pour over the top. Maybe I'll do both. ;) 

This was good but it would've been better with a little sauce.
A Feta and Red Pepper spread over the top or some type of sauce would've been tasty...

Feta and Sundried Tomato Chicken

Yield: 2-3 servings

Ingredients:
  • 2 large chicken breasts
  • 1/2 c crumbled feta cheese
  • 1/2 c sundried tomatoes in olive oil, diced
  • 1/2 tbs garlic, minced
  • spray oil
Directions:
  1. Preheat oven to 375F. Or pan fry to seal in the juices.
  2. In a med bowl, add feta, tomatoes and garlic. Mix well.
  3. Cut slit through chicken breasts and stuff with feta mixture.
  4. Bake for 40 mins or until baked through.
  5. Prep a sauce to pour over the top as this was a little dry. A little bechamel sauce or wine sauce would've been great! :) ENJOY!!!

Wednesday, April 7, 2010

Swiss Chard Soup

The easiest way to get my fam to eat leftover meat is to make soup. It's a great way to use up lots of veggies, too. Soup is so versatile and tastes different every time. We love the smorgasbord of flavors from the various veggies I throw in the pot. Great stuff, for sure!

I had a lot of organic swiss chard so I used quite a bit in the soup. I also had organic rosemary from my CSA basket so I added a sprig to the soup and let it simmer for an hour. The rosemary added a new taste that my fam isn't used to. It was really tasty!

Yummy!

Swiss Chard Soup with White Beans

Yield: 4 servings

Ingredients:
  • 4 c beef stock (use veggie or garlic broth for vegan soup)
  • 1/2 c orange bell pepper, diced
  • 1/2 c red onion, diced
  • 1 sprig fresh rosemary
  • 2 tsp garlic, minced
  • 1- 15 oz can Great Northern beans, drained and rinsed (or bean of choice)
  • 1-2 c beef, bite-sized pieces (sub cubed firm tofu for vegan soup)
  • 4 c Swiss chard, chiffonade
  • hot sauce, shredded cheese or parmesan cheese, optional 
Directions:
  1. Heat beef stock over med-high heat and bring to boil.
  2. Turn down heat to med. and add veggies, rosemary, garlic, white beans and beef. Turn heat down to low and simmer for 1-2 hrs.
  3. Add swiss chard and simmer for 10-15 mins or until chard is cooked down. 
  4. Serve with salad and/or rolls.

Tuesday, April 6, 2010

Easy Peasy Potatoes

Pan frying diced potatoes was the first dish I made really well. It's so easy to put together and you can throw in any type of veggies and/or meats you have to make a nice meal or side dish. I used to make this for breakfast every weekend and then I started eating it for lunch or even as a side with dinner. Eat this on its own, served with scrambled eggs or in burritos or a quesadilla. Great stuff! 

Super easy and great to eat any time of day!

Easy Peasy Potatoes

Yield: 4 servings

Ingredients:
  • 4 small potatoes, diced
  • 1 small red bell pepper, diced
  • 1/2 red onion, diced
  • 1 tbs garlic, minced
  • 1/2 lb mild Italian sausage (remove casings)
  • 1-2 tsp extra virgin olive oil
  • salt and pepper to taste
  • 2-3 green onions, sliced for garnish
  • sour cream, shredded cheese, crushed red peppers, salsa or hot sauce, optional
Directions:
  1. In large saute pan, heat olive oil over med-high heat. Add 1/2 tbs garlic and diced potatoes and cook for 10-12 mins or till done. Stir occasionally to avoid burning potatoes. Set aside in a bowl and keep warm.
  2. Saute bell pepper, onion, and remaining garlic for 5-8 mins. When done, add to bowl with potatoes and keep warm.
  3. In same pan, cook Italian sausage. When cooked through, add potatoes and veggie mixture back to pan. Saute for another 5-8 mins or until everything is heated through.
  4. Serve with tortillas, eggs, in a burrito or as is. It's great with salsa, too! ENJOY!

Monday, April 5, 2010

Greek Yogurt "Parfait"

When I take my kids grocery shopping, they always ask me to buy Trix yogurt, Crush Cups or some other type of junky yogurt that's full of sugar and food coloring. I don't like buying that stuff, but every once in a while, I give in because they like it so much. It's a treat for them, they really enjoy it and I enjoy watching them eat it up. Their lil' faces glow and they're all smiles as they savor every bite. They're so easy to please sometimes. :)

Costco was sampling Greek Nonfat Yogurt topped with a little honey. The boys really loved it so I bought a container knowing it was a better choice compared to the junky yogurt they ask for. We also picked up blueberries and the boys ate greek yogurt topped with blueberries and honey after school for a couple of days. When the blueberries ran out, I made the boys "fruit parfaits" and poured a little cereal in a bowl and topped it with yogurt and homemade plum preserves. It was delicious! What a healthy little snack considering all the junky alternatives they could've picked. This is packed with protein and perfect for holding you over till dinner time. Great stuff!

Son #2 likes to eat the yogurt without mixing it.

Son #1 likes to stir it all together.

Greek Yogurt Parfait with Plum Preserves

Yield: 2 servings

Ingredients:
  • 8 oz greek yogurt
  • 2-3 tbs plum preserves (or fresh fruit)
  • 1/4 c corn flakes or granola-type cereal
Directions:
  1. Add 1/4 c cereal in bowl.
  2. Top with yogurt.
  3. Spoon plum preserves (or fresh fruit) on top.
  4. ENJOY!
Related Posts with Thumbnails